Library Contents Search the Library RV Tech Library Help Page Site Map About Us Tiffin RV Network TRVN Classifieds Campground Reviews Photo Gallery TRVN Store
Appliances Batteries Boondocking/Dry Camping Chassis Clubs & Forums Electrical Electronics Engines Exterior Maintenance Generators Heating & Air Conditioning Interior Maintenance Misc Items Operating Tips Plumbing Red Bay Safety & Health Storage Supplier Contacts Tires and Wheel Rims Towing Transmissions Weighing
![]()
Replacing the Engine Air Filter
2007 Phaeton, MBE 926 Engine
- Remove the access cover in the driver's side rear compartment.
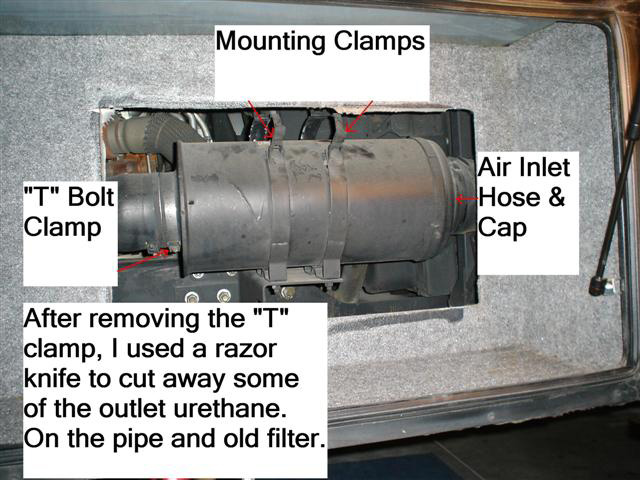
- Remove the "T" bolt clamp from the outlet side of the Air Filter.
- Remove the three self tapping screws from the air filter inlet cap. Use a small hammer and screwdriver to push the inlet cap and hose from the air filter.
- Release and move back the two mounting clamps on the air filter housing.
- Using a sharp razor knife cut the urethane molded end (outlet end of old air filter). The part that was under the "T" bolt clamp until you can rotate the old air filter and slide it to the right and away from the air outlet tube bead. The old urethane is no longer flexible and it may take cutting part of the end of the filter as well before you will be able to slide it to the right and off of the beaded tube.
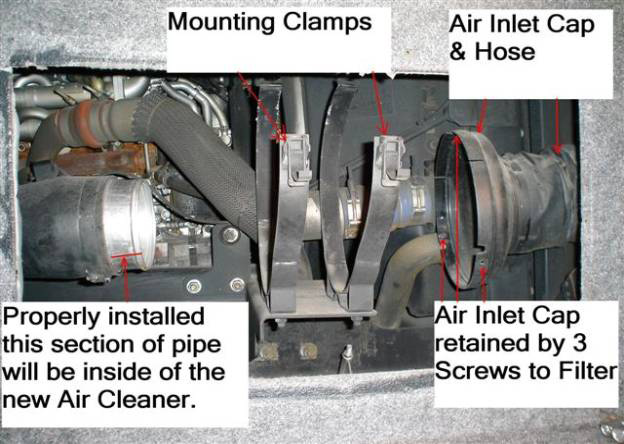
- Now you can move the old air filter can to the right. Move the air inlet cap and hose back, until you have enough room to move the old air filter to the right and turn the right end down and the left end up. Keep working it and the old air filter will come down and out.
- Now that you have the old filter out of the way. Remove the clamp from the air inlet cap and hose. You may need to be gentle, use something to loosen the hose away from the cap. Once the cap is loose, remove it from the hose.
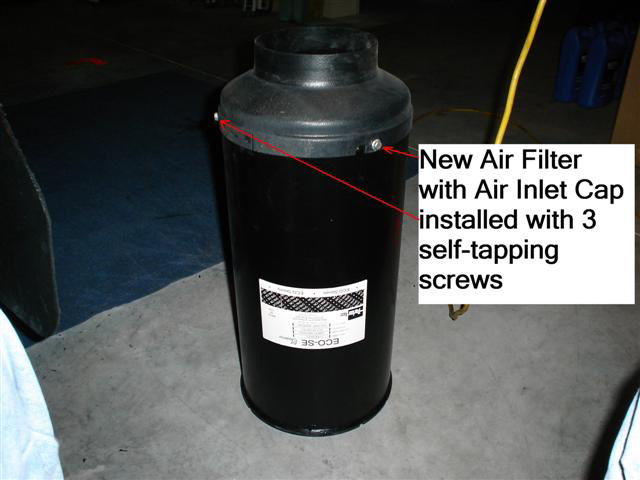
- Position the air inlet cap over the new air filter, matching the cap rotation location to the old filter. Align the rivets on the filter with the slots in the cap. Install the three self drilling screws to hold the cap on the new filter.
- Now to re-assemble. In reverse order, bring the new air filter up from the bottom. Tilt the filter toward the front and slide it into the cradle.
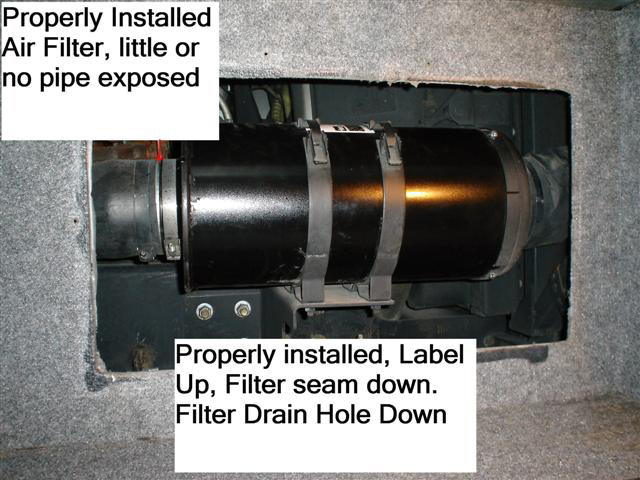
- The next part is critical, insert the new air filter over the tube bead. The fit will be snug, rotate the air filter as necessary to get it to slide over the tube bead and tube.
- When you have the air filter on the tube, rotate the logo to the top, this will place the filter seam on the bottom. At this point you should be able to see very little tube if any at all.
- Fasten the two mounting straps. Reinstall the "T" bolt clamp on the air filter outlet tube, using a ratchet and socket.
- Slide the inlet hose over the air filter inlet cap, snuggly install the hose clamp making sure that the hose is pushed tightly against the cap.
- Reinstall the air filter access cover. You may need to caulk around the engine side of the access cover to prevent water from entering the compartment, when it is raining.
Submitted by Ted Bryan - 6/12/09
The RV Tech Library is brought to you by the TiffinRVnetwork
Absolutely No Affiliation exists between this group and Tiffin Motor Homes Inc or the Allegro Club. This website neither endorses or discourages the use or purchase of a Tiffin product. All references, suggestions, comments, etc. contained herein are the opinions/experiences of the posters and not those of Tiffin Motor Homes Inc. or the website administrators.
|
|