Library Contents Search the Library RV Tech Library Help Page Site Map About Us Tiffin RV Network TRVN Classifieds Campground Reviews Photo Gallery TRVN Store
Appliances Batteries Boondocking/Dry Camping Chassis Clubs & Forums Electrical Electronics Engines Exterior Maintenance Generators Heating & Air Conditioning Interior Maintenance Misc Items Operating Tips Plumbing Red Bay Safety & Health Storage Supplier Contacts Tires and Wheel Rims Towing Transmissions Weighing
![]()
Installing SeeLevel 709 Sensors and Dual Monitoring Stations
I just finished installing my new Dual See Level 709 tank monitors and sensors. The 709 tank monitors and sensors allow me to check the fluid levels on my fresh water, grey water and black water tanks. I can also check the LP level and the coach battery voltage level.
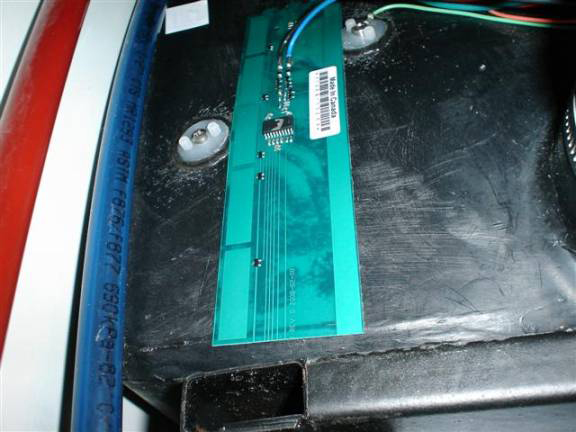
I installed one monitor in the wet bay to aid in dumping and refilling the fresh water tank. Tiffin installed the deeper wedge side of the fresh water tank on the passenger side of the RV, by doing that the OEM tank monitor when displaying full is really only at about 65 percent of capacity. I installed the 710ES sensor on the passenger side of the tank, by doing so I can obtain a true indication of the level of fresh water in the tank. On my 2007 Phaeton I cut the tank sensor at 7.5 inches. 200 grit sand paper was used to smooth the tank surface. After that I cleaned the tank surface with acetone to remove any grease, dirt or oils. I used painters blue tape to temporarily stick the sensor on the tank. I then filled the fresh water tank until it overflowed. At that point I dumped a couple of gallons of water. I used this as my 100 percent tank fill level. I checked the sensor to make sure it was reading 100 percent. It was displaying 95 percent instead of 100 percent so I moved the sensor down slightly until it displayed 100 percent. Here is a picture of that fresh water sensor.
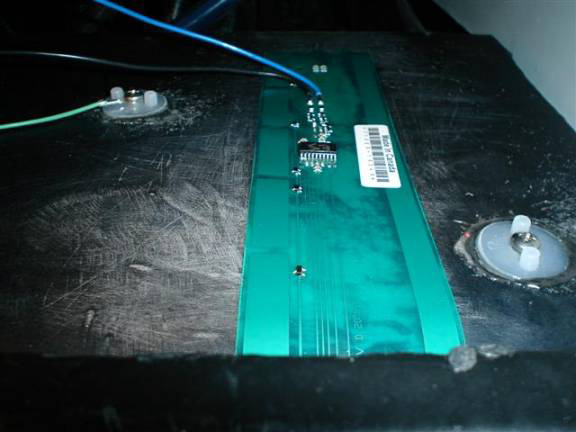
The next phase was to install the grey and black tank sensors. These two sensors are installed on the driver's side for the same reason the fresh water sensor was installed on the passenger side. The tanks are built with the taller side on the driver's side of the RV. The black water sensor was cut to 7.5 inches tall. I filled this tank to capacity, therefore knowing in advance that the tank was full. I again sanded the side of the tank and cleaned the tank with acetone. I again temporarily attached the tank sensor with blue painters tape. I found the best placement of the sensor was for the bottom of the sensor to be attached to the tank where the tank side wall began to round under for the tank bottom.
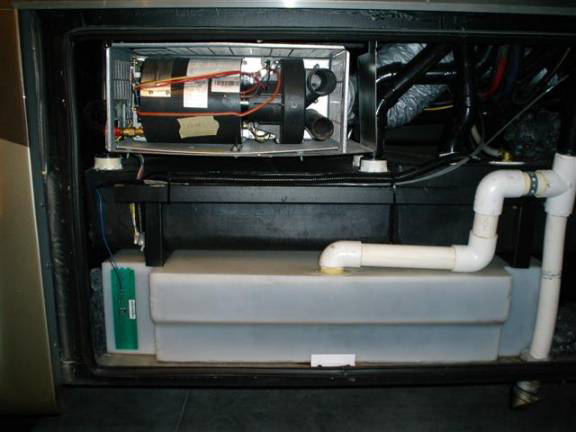
As you can see, I did not need to shield or remove any steel for this install. The end of the sensor is about 3/4 of an inch from the metal frame. To make my pictures space correctly, I will explain how I routed the LP tank sensor wire. I installed a # 18 green wire from the LP tank sender into the basement placed the wire in the wiring tray on the inside of the drivers side frame rail. I then routed the wire into the space above the hot water heater and then into the wet bay. At that point I connected the wire to my four wire See Level wiring harness. I used a green wire to conform to the see level color code. I installed # 18 four conductor stranded cable from the RV hallway up and over the pantry and then down the open chase into the passenger side of the tank bay. I made my fresh water sensor connection and then routed the cable across the top of the tanks into the tank area behind the wet bay. I then connected that cable to the see level wiring harness. I installed one see level monitor in the wet bay and the second monitor in the hallway. All wiring connections were soldered and protected with heat shrink. Moving forward to the grey tank sensor. This sensor submitted to the same treatment for preparing the tank surface as the previous two sensors. I filled the tank to capacity and then found the sensor position on the grey tank to be the same as the black tank sensor. The bottom edge of the sensor is located at the beginning of the curvature of the tank. This placement of the sensor also displayed 100 percent fill.
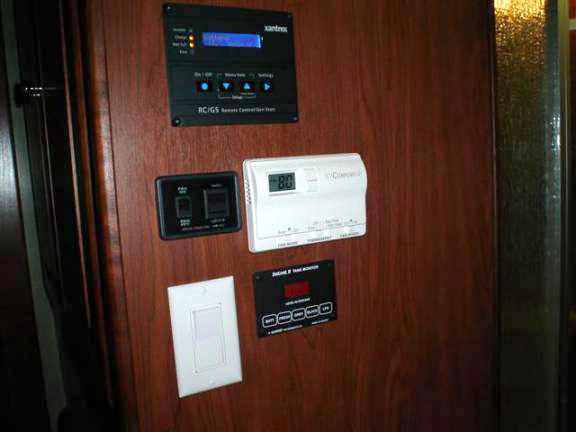
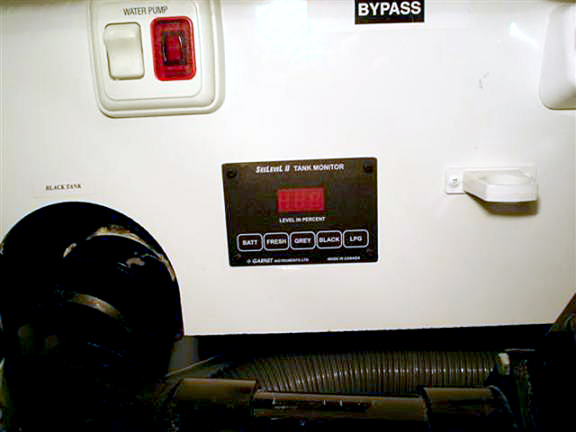
The following picture is the placement of the hall monitoring station. As you can see I have relocated the Xantrex Generator remote to this position. I have also installed three- way switching for the living room overhead lighting. The living room lights can be turned on or off with the hallway switch or at the entry door with a three way switch locate there also. Also behind the Xantrex remote is where I located the two diodes which allow me to program the auto generator start feature to start the Onan generator when either the front or rear thermostat (or both thermostats) call for air conditioning or electric heat.
My coach had three unused fused positions on my fuse panel, F18, F19 and F20. My fuse panel is located under the refrigerator. I installed a red # 18 wire to F18 and connected a black # 18 wire to the ground block mounted under the refrigerator. I routed both of those wires down into the hot water heater compartment and then into the wet bay. Both wires were connected to the four wire # 18 cable and also the see level four wire harness. I used 30 feet of # 18 four conductor stranded cable. 30 feet of # 18 green stranded wire for the LP tank sensor. 10 feet of # 18 black stranded wire and 10 feet of # 18 red stranded wire. The see level components were two 709 consoles and three 710ES sensors. That is everything except the little bit of solder and shrink wrap for the connections.
Both monitors display 100 percent when the tanks are full and both monitors display 0 when the tanks are empty. The percent of LP will vary slightly depending of temperature.
Submitted by Ted Bryan - 6/12/09
The RV Tech Library is brought to you by the TiffinRVnetwork
Absolutely No Affiliation exists between this group and Tiffin Motor Homes Inc or the Allegro Club. This website neither endorses or discourages the use or purchase of a Tiffin product. All references, suggestions, comments, etc. contained herein are the opinions/experiences of the posters and not those of Tiffin Motor Homes Inc. or the website administrators.
|
|